Lecture 02/11/2004


 Network File System (NFS)


I.   Various types of file sharing

II.  NFS protocol

III. NFS server side

IV.  NFS client side

V.   NFS security and optimization
I. Various types of file sharing
Ancient techniques:
Non-network (tape, floppy, HD, CD)
UUCP (unix-to-unix)
DECnet
Modern non-commercial techniques:
Modern commercial techniques:
AFS (from IBM)
DFS (from IBM)
The other techniques to transfer file between hosts over the network:
SMTP (email)
HTTP (web)
ftp, sftp
rcp, scp
rdist, rsync
II. NFS protocol
**For Comprehensive Guide to NFS, refer to the documentation on the link below:
NFS-HOWTO
NFS was originally developed by Sun Microsystems:
NFSv2 released in 1985
NFSv3 released in 1995
NFSv4 released in Dec. 2003 for Sun and NetApp
Linux in development stage (Univ. of Michigan)
NFS defines a method of sharing files in which files residing on one or
more remote servers can be accessed on a local client system in a manner
that makes them appear as local files and directories.
Example: the DSV lab machines.

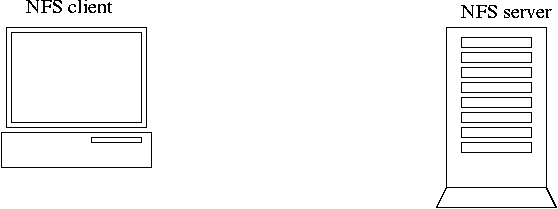
Figure 1 The division of NFS between client and server
Server NFS daemons:
portmap
mountd
nfsd
rquotad
nlockmgr
status
The portmap holds the port, service number and version numbers
for each RPC service. If the portmap goes down, then all services
need to be restarted after the portmap is restarted.
Client NFS daemons:
Mounting a remote file system over NFS:
mount --- RPC request ---> portmapper
mount <-- port number --- portmapper
mount --- RPC request ---> mountd
mount <-- respond -------- mountd
I/O (Read/Write) access
write() ---- I/O --------------> nfsd
write() <-- ACK upon complete--- nfsd
NFS server side
A server exports a file system to the specified hosts and allows
them to mount it.
To specify what file system to export and to what hosts through
/etc/exports file:
file-system host( options )
For example:
/home unisys01(rw) unisys05(ro)
/exports unisys*(rw)
To export directories manualy, run command:
/usr/sbin/exportfs -o rw unisys01:/home
To un-export, run:
/usr/sbin/exportfs -u unisys01:/home
Export common options:
ro
rw
root_squash
no_root_squash
all_squash
no_all_squash
anonuid=xxx
anongid=xxx
sync (NFSv3)
async (NFSv3)
noaccess (used with nested exports)
For example, noaccess in /etc/exports can be used as follows:
/users node*(rw)
/users/alexei (noaccess)
Default options: ro, async, root_squash
To run the Server NFS services, the following RPM packages need to be installed:
To start the NFS services, run the startup scripts:
/etc/rc.d/init.d/portmap start
/etc/rc.d/init.d/nfs start
/etc/rc.d/init.d/nfslock start
To make sure that the RPC services are running:
/usr/sbin/rpcinfo -p
Every time when you modify /etc/exports file, run
/usr/sbin/exportfs -r
or
/usr/sbin/exportfs -a
to preserve any manual exports
To verify exports, run
/usr/sbin/exportfs -v
or
/usr/sbin/showmount -e
To start NFS services at bootup time, run ntsysv,
and check-in portmap, nfs and nfslock. Alternatively,
chkconfig --level 3 portmap on
chkconfig --level 3 nfs on
chkconfig --level 3 nfslock on
NFS client side
NFS clients mount directories exported to them from the NFS servers.
To verify that the server allows you to access its RPC (including NFS)
services, run
/usr/sbin/rpcinfo -p server_name
To check what directories it exports to you, run
/usr/sbin/showmount -e server_name
For correct file locking, statd and lockd should be running on an NFS client.
They are started by scripts:
/etc/rc.d/init.d/portmap start
/etc/rc.d/init.d/nfslock start
There are two kinds of mounts, we nominate them as:
Standard mount
Mount point (directory) needs to be created before mounting
an NFS file system. For example,
mkdir /mnt/nfs
The NFS directory can be mounted manually:
mount -t nfs server_name:/exported_dir /mnt/nfs
Then run df -h to see if it has been succesfully mounted.
Manual mounting with options other than defaults:
mount -t nfs -o rw, hard, rsize=2048, wsize=2048 server_name:/exported_dir /mnt/nfs
Most Common Options
rw
ro
bg
hard
soft
intr
nonintr
timeo
retrans
rsize
wsize
nosuid
noexec
To unmount a directory, you can run command
umount /mnt/nfs
The NFS directories can be mounted at bootup time if they are
included in /etc/fstab file:
# file system mount point fstype flags dump fsck
server1:/home /mnt/home nfs rw,intr,hard 0 0
server2:/users /mnt/users nfs defaults 0 0
When /etc/fstab has been modified, you can run
mount -a
or
mount -r
or reboot the machine
Automount
The automounter provides an on-demand method of mounting NFS file system
and automatically unmounts them after a designated time period of inactivity (default 5 min).
For automount to work, autofs RPM has to be installed.
The autofs uses so called "indirect" maps.
Automount maps configuration.
The master map /etc/auto.master:
# access directory indirect map file timeout in sec.
/mnt/home /etc/auto.nfs-home --timeout 60
/mnt/software /etc/auto.nfs-soft --timeout 300
/mnt/docs /etc/auto.nfs-docs
A client request to access a directory tree whose root is listed in the
master map (such as cd /mnt/software) will cause the automounter to
search the specified map for a server to satisfy the request.
The indirect map files./etc/auto.nfs-docs:
doc1 -ro,soft,intr server1:/export/docs/doc1
doc2 -ro,soft,intr server2:/export/docs/doc2
/etc/auto.nfs-soft
matlab server1:/export/matlab server2:/export/matlab
/etc/auto.nfs-home:
* -rw,hard,intr server1:/export/home/&
To start automount daemon, run
/etc/rc.d/init.d/autofs start
After you modify the maps, run
/etc/rc.d/init.d/autofs reload
To invoke autofs at the startup, run ntsysv
and check in "autofs" or run
chkconfig --level 3 autofs on
To verify that the autofs is running,
/etc/rc.d/init.d/autofs status
NFS security
Restrict remote access to a portmapper via tcp_wrappers. In /etc/hosts.deny:
portmap: ALL
In /etc/hosts.allow:
portmap: 192.168.5.1 , 192.168.1.
Do not use no_root_squash in export options
Use nosuid and nodev mounting options
More detailes on security: Sec. 6 NFS-HOWTO
Performance optimization
On an NFS server: optimize number of concurently running nfsd daemons.
On an NFS client: optimize wsize and rsize blocks for write/read performance.
More details on optimization: Sec. 5 NFS-HOWTO
Assignment due by 02/18/2004
1. Setup your desktop machine as NFS server and your cluster node as
NFS client.
Make sure that all necessary packages have been installed;
Create a directory on top of your home directory to export it,
for example,
mkdir /home/exports
chmod 755 /home/exports
Create a dummy user and its owhership to the directory:
/usr/sbin/groupadd -g 666 jonny
/usr/sbin/useradd -u 666 -g 666 jonny
chown jonny:jonny /home/exports/
Copy some files from /etc into directory /home/exports and
give them ownership "jonny":
cp /etc/hosts /home/exports
cp /etc/nsswitch.conf /home/exports
cp /etc/xinetd.conf /home/exports
Then cp /etc/securetty /home/exports and
live its root ownreship.
Include the directory in /etc/exports to export it to your node, for
example, node02:
/home/exports node02(rw)
Make sure your node and its IP address are included in /etc/hosts file.
Start portmap and NFS services:
/etc/rc.d/init.d/portmap start
/etc/rc.d/init.d/nfs start
/etc/rc.d/init.d/nfslock start
Make sure the services are running:
/usr/sbin/rpcinfo -p
You should see
program vers proto port
100000 2 tcp 111 portmapper
100000 2 udp 111 portmapper
100011 1 udp 931 rquotad
100011 2 udp 931 rquotad
100011 1 tcp 934 rquotad
100011 2 tcp 934 rquotad
100003 2 udp 2049 nfs
100003 3 udp 2049 nfs
100021 1 udp 1046 nlockmgr
100021 3 udp 1046 nlockmgr
100021 4 udp 1046 nlockmgr
100005 1 udp 1047 mountd
100005 1 tcp 1925 mountd
100005 2 udp 1047 mountd
100005 2 tcp 1925 mountd
100005 3 udp 1047 mountd
100005 3 tcp 1925 mountd
100024 1 udp 1048 status
100024 1 tcp 1926 status
Login remotely to your node machine via rsh or ssh and run rpcinfo
pointing it at your desktop, for example:
/usr/sbin/rpcinfo -p unisys02
If you see the same output as on the NFS server, it means that the server
allows you to access the portmap and its rpc services.
Check what directories are exported to you from the server:
/usr/sbin/showmount -e unisys02
It should show /home/exports node02.
Now you are ready to mount its directory on the node.
Create a new mounting point and mount the exported directory onto it:
mkdir /home/exports
mount unisys02:/home/exports /home/exports
Run df -h command to make sure the directory has
been mounted. The mounted directory shows up in the bottom of the file
systems list:
unisys02:/home/exports 494M 78M 390M 17% /home/exports
Run ls -l /home/exports/ to see who the files
in the directory belong to.
Since there is no user with UID=666 and GID=666 on the node,
the mounted directory would belong non-existent user:
ls -l /home/exports/
total 5
-rw-r--r-- 1 666 666 104 Feb 10 19:32 hosts
-rw-r--r-- 1 666 666 1750 Feb 10 19:32 nsswitch.conf
-rw------- 1 root root 114 Feb 10 2003 securetty
-rw-r--r-- 1 666 666 289 Feb 10 19:32 xinetd.conf
Create user jonny with UID=GID=667 and
try to change the ownership of the directory on the node:
chown jonny:jonny /home/exports
Does it work? Why?
Change the UID and GID of jonny to be consistent with those on the NFS server:
/usr/sbin/groupmod -g 666 jonny
/usr/sbin/usermod -u 666 -g 666 jonny
Become user jonny; cd /home/exports and see if you can create files in
this directory.
Unmount the directory,
umount /home/exports
Modify file /etc/fstab including a new entry for /home/exports:
unisys02:/home/exports /home/exports nfs rw 0 0
Then run
mount -a
Check if it is mounted
df -h
Remove the entry from /etc/fstab and unmount the directory.
If the directory can not get unmounted and you receive error message
"device is busy", check what processes hold the directory by executing
fuser command: /sbin/fuser -m
(file_system)
For example, /sbin/fuser -m /mnt/nfs
Kill these processes and try to unmount the directory again.
Try to avoid NFS mounting through /etc/fstab. Use either
manual mount or automount.
2. Mount the directory on the node again. Shutdown the NFS server on your
desktop:
/etc/rc.d/init.d/nfs stop
Try to access the NFS mounted directory, for example, with ls. Try to unfreeze the
terminal. Start the NFS server on you desktop
/etc/rc.d/init.d/nfs start and try to
access the directory again.
3. Repeat exercise #2 using options rw,intr,hard in
mount command.
4. Repeat exercise #2 using options rw,intr,soft in
mount command. Wait for 30 - 60 seconds until it time outs.
5. Finding the optimal write and read block sizes (wsize, rsize).
Modify /etc/exports on the NFS server to allow root access to the
exported directory on the client:
/home/exports node02(rw,no_root_squash)
Re-export the directory, /usr/sbin/exportfs -r
On the client node, mount the directory with read and write block sizes
option rsize=1024,wsize=1024:
mount -o rsize=8192,wsize=8192 unisys02:/home/exports /home/exports
Run ls -l /home/exports to make sure the
directory is accessible.
Check the time (real time) it would take to write 1.6 MB file over
the NFS:
time dd if=/dev/zero of=/home/exports/testfile bs=16k count=100
Check how long it would take to read this file:
time dd if=/home/exports/testfile of=/dev/null bs=16k
Unmount the directory. Repeat the same procedure with rsize = wsize =
2048, 4096, 5125, 8192, 10240, block sizes (they are N*1024 Bytes).
What is the optimal block size?
6. Protecting portmap with tcp_wrappers.
Unmount the NFS directory on the node. On the NFS server, put entry in
/etc/hosts.deny
portmap: ALL
Try to mount the directory on the node.
On the NFS server, in file /etc/hosts.allow, put entry allowing to
mount the directory on your node:
portmap: 192.168.5.22
7. Install autofs on you machine. Configure /etc/auto.master and indirect
maps to mount the directory in exercise#1 automatically; specify the
timeout 60 seconds; start the autofs; run df -h;
cd to this directory; leave the directory and
run df -h; run df -h
again after about a minute.
8. Read Chapter 28